Create a Webhook
Configure Youmanage to send event data
Summary
Following on from our introduction to webhooks this tutorial series will now take you through the process of creating your own webhook powered integration.
This will go from configuring a webhook within Youmanage to creating a server application that can listen for events sent from your own Youmanage instance.
Configuring a Webhook
The first step in the process is to configure a webhook within the Youmanage application. Creating and viewing configured webhooks can be found in Admin -> Integrations -> Webhooks.
Selecting the plus (+) icon in the top right brings us to the following screen which asks for some key pieces of information to make sure that the right event information goes to the right place, but we'll go through each of these fields below.
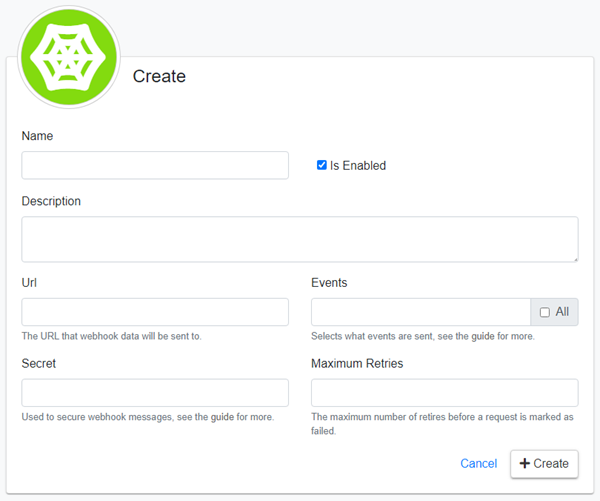
Name and Description
Each webhook requires a name, which must be unique, and a description which will help to identify the purpose of each webhook. This is especially useful when there are multiple webhooks configured on a single instance.
Is Enabled
By default, a webhook is enabled and will send requests whenever events are raised. However, if you wish to stop requests temporarily you can do so here without having to delete the webhook.
URL
The URL field is the URL address of the server that will receive the webhook POST messages sent from Youmanage.
If you intend to follow along with this tutorial series and develop a sample application locally, set this to http://localhost:4759/Process. We'll explain why later on when we get to configuring the receiving server.
Events
Events form the basis of webhooks and map directly to actions taken within your instance of Youmanage, which are then sent to your server for you to act upon. For example, if a user were to update an employee's record then the information about the employee being changed, along with the changes made, would be sent as an Employee:Update event to the configured URL.
You can choose to select all events by checking the All checkbox, which will include all currently supported events as well as any that are developed in the future. Be careful as this could lead to a large amount of traffic coming to your server.
You may choose instead to select only the events that your integration is interested in. To do this simply enter in the entity followed by a colon and then the action(s) that you wish to be notified of. For example, if you only want to be notified when a new Employee is added to Youmanage, you would enter Employee:Create. For more detailed information on selecting multiple event types see the guide on Events and Payloads.
Secret
Adding a secret to a webhook enables your server to verify that the messages being received are from Youmanage. Each request will send an additional X-Youmanage-Signature header along with the payload. For more information on securing webhooks and verify message contents with a Secret, see the guide on securing webhooks.
Maximum Retries
This sets the number of times that a webhook message will be sent before being marked as failed, after which no more deliveries will be attempted.
Next up we'll look at configuring your server to receive webhook request payloads.